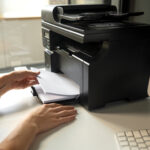
Epson XP-6100 Printer: A Comprehensive Guide for Windows and Mac Users
Complete Setup of Epson Printer Xp on Window and Mac
So in this blog we are going to explain how to install the Epson printer step by step. Most of the people choose the best printer for home and work use, but while setting it up, sometimes it gives us a pain in the head why it’s not printing or connecting. Sometimes it becomes a big task for those who are beginners in it. So without wasting time, let’s follow the instruction to set it up step by step.
Step 1. (A) Unboxing the Printer
1. First of all, we need to remove the printer from the box.
2. So first, we need to remove all the protective materials from the printer.
(B) Turn on and configure the printer
3. Then turn on the printer.
4. Adjust the control panel.
5. Then you need to select the language.
(C) Installation of Ink Cartridges
6. To install the printer cartridges, you need to lift up the scanner unit first.
7. Then gently shake the ink cartridges.
8. Unpack the ink cartridges.
9. Remove all protective tapes from inside the printer.
10. Then, insert the cartridges at an angle in the holder for each.
11. Press each cartridge upside-down until it clicks.
12. Then lower the scanner unit.
13. Then select installed and then press the Ok button to start charging the LCD display.
14. Wait up to 10-12 minutes and let the screen charge.
(D) Paper Loading

1. First of all, you need to lower the front cover.
2. Then pull out the cassette of the paper.
3. Slide the side edge guides outward.
4. Then insert the paper with the printable side facedown.
5. But not too tight; make sure the paper is under the tabs on the side edges.
6. Make sure the cassette is flat as you insert it all the way.
7. Then you need to select the paper settings on the printer’s control panel display.
8. Then pull out the output tray.
(E) Installation of Printer Software
So first, you need an internet connection, which is required to obtain the products software.
1. First of all, you can visit Epson’s official website to set up printer driver software.
2. You can visit www.epson.com
3. First of all, we need to install the printer drivers from the website.
4. After that, open the download page and then install the drivers.
5. Then follow all the onscreen instructions.
6. After running the setup on the computer.
7. When you see the Select your connection automatically attempts to set up your wireless connection.
8. If not successful, you need to enter the network name (SSID) and password.
(a) Wireless Connection—You can install the printer in two ways; wireless is one of them. Users mostly set up their printer wirelessly. The software installer automatically attempts to set up your wireless connection.
(b) On the other hand, direct USB connection is also used by most users who don’t want to set up wirelessly.
2. Simply connect the cable to the printer and computer. Then follow the instructions.
Connect Epson Printer with Windows Computer
WiFi Setup Connect
1. First, on the printer screen, you need to select <Settings>. First
2. Then select <Network Settings>
3. Select <WiFi Setup>. Then, you need to select the recommended Wi-Fi.
4. Then you need to Tap on <Start Setup>
5. After that, select <WiFi Setup Wizard>
6. Now your printer is searching your network and will give you a list of available networks
7. Select your wifi or network name from the list.
8. Then click on OK to enter the password (Wi-Fi password).
9. Then tap on Start. Now it would be showing you connecting to the network (wait up to 2-3 minutes)
10. Now you would see the Wi-Fi printer setupis complete, and now you are ready to use this printer.
11. Go to your Windows computer and go to Settings or Printer and Scanner.
12. Then add devices, and then select your printer.
13. Or click on the Start button and go to settings, or type searchprinter and scanner in search, then select Add Device or Printer.
14. Ready to print anyting.
Epson Printer Wi-Fi Setup on Mac Computer
Now we will read how to connect or set up a printer on a MacBook computer. This is the Wi-Fi setup. You can also do a USB setup or set up with home or office wifi setup so lets see.
1. Go to the Printer Display or Press home button firsten select <Settings> and and press ok
2. Select the network settings and then the Wi-Fi setup.
3. WiFi Recommended: Then, click on the WiFi Setup Wizard.
4. It will search the available network and will show your Wi-Fi network name.
5. Select your Wi-Fi and enter the Wi-Fi password, then click Ok after entering the password.
6. After entering the password, go to your printer’s main display screen or press the home button.
7. Select “System Preferences,” then select “Printer and Scanner.”
8. Then, on the bottom left side of the printer scanner option, click on (+).
9. Then it will display your printer name, so select your printer name and then
10. Click on Add, then connect to your Mac computer.
11. Now the printer is connected, and you can print or scan with this printer. All Set up
USB Cable Method to Connect with Mac
1. Connect the wire to the printer and the USB port on the Mac computer.
2. Then click on System Preferences and select Printer and Scanner.
3. Click on the plus sign (+), and then you will see your printer name showing on the screen
4. Select the printer and then click on Add.
5. Printer is connected with USB cable. Now you are ready to print and scan.
