
HP Deskjet 2800 Series Printer—Complete Guide
HP Deskjet 2800 Series Printer—Complete Guide
If you are looking for the right and easy solution to set up your printer, you are in the right place, and this blog is for you. In these days, printers have become very important devices for most people for their daily use, and we can’t hold our work without them.
Because printers are being used in every field and sector for home, business, school, organization, etc. So in this blog, we will instruct you on how to set up a printer.
How to connect a computer to wifi?
How to connect your laptop to a printer?
How to connect printer to wifi/new wifi, etc., so let’s begin.
A. Unbox the printer first-
1.First of all we will remove the printer from the box.
2.Then remove all the tapes and packing materials from the outside of the device.
3.After that lower the output tray and then remove the tapes from the cartidge access door.
4. Having opened the cartridges door,remove all the tapes and cardboard from inside of the printer.
5. Then close the ink cartridge access door.
6.Remove all the materials from the box.
7.Reuse the box and packaging matarial which came with box.
B. Connect the power cord properly.
After unboxing and removing all the tapes and matarials you need to be ready with power cord and wires etc.
1.Plug the printer into an electrical board or outlet and then turn your printer on by pressing power button.
2.Connect the power cord to the back of the printer and then put into electical outlet or socket.
3.Then Press the power button /On off button on the printer
4.Wait until the printer is silent.

C. Add the printer to HP Smart
Yes, HP Smart is the application that we can find in your computer’s Microsoft Store (in Windows OS) and App Store (in macOS).
Lots of people make mistakes; they download the HP Smart or search on Google, but they need not worry. I will guide you through some simple steps to install HP Smart.
Here are some steps that you can follow to download and set it up:
1. The HP Smart app is required and helps you connect your device. It also guides you with the rest of the setup process and will complete the setup.
2. Download the Microsoft Store on your Windows computer, or if you have a Mac, go to the App Store.
3. In the window, press the window key/button (the window key is the bottom left-hand side of your keyboard and looks like 4 flat boxes).
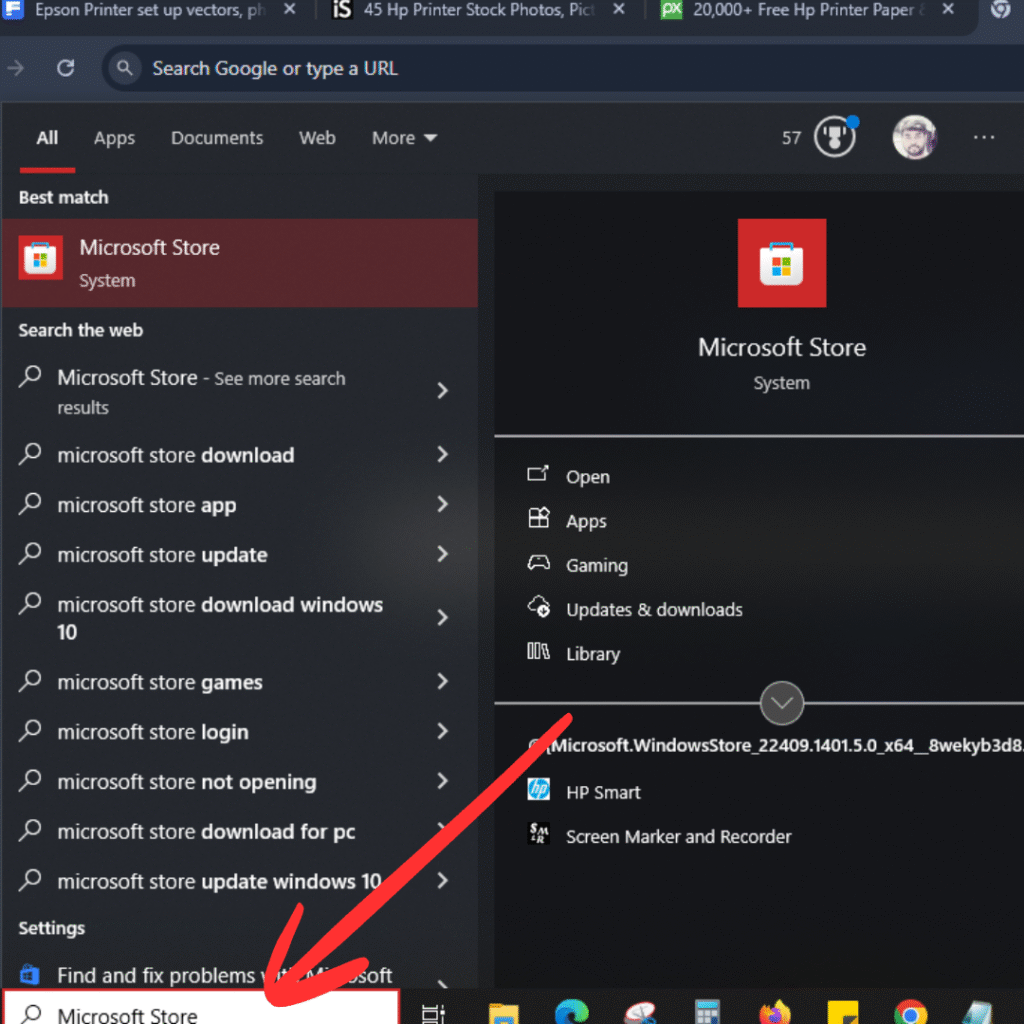
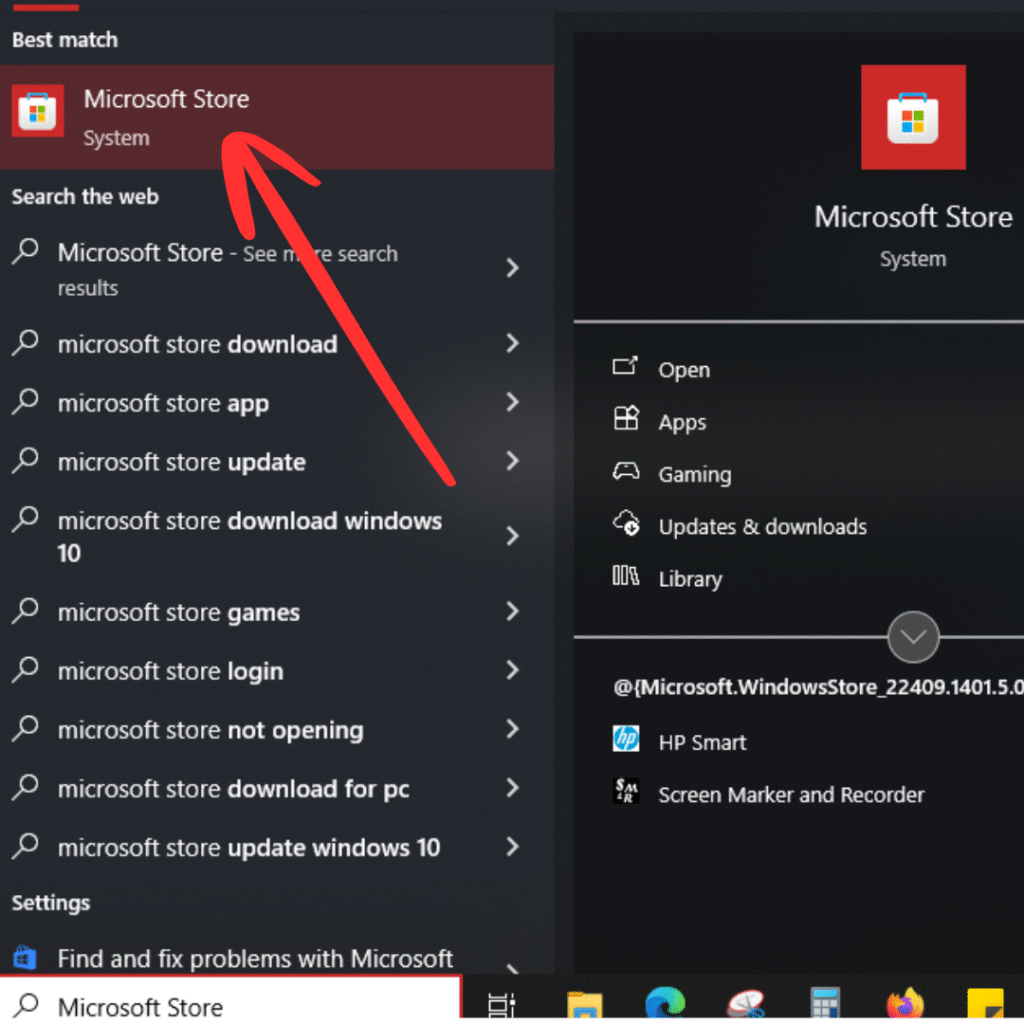
4. Once you press the Windows key, you need to search for “Microsoft Store.”
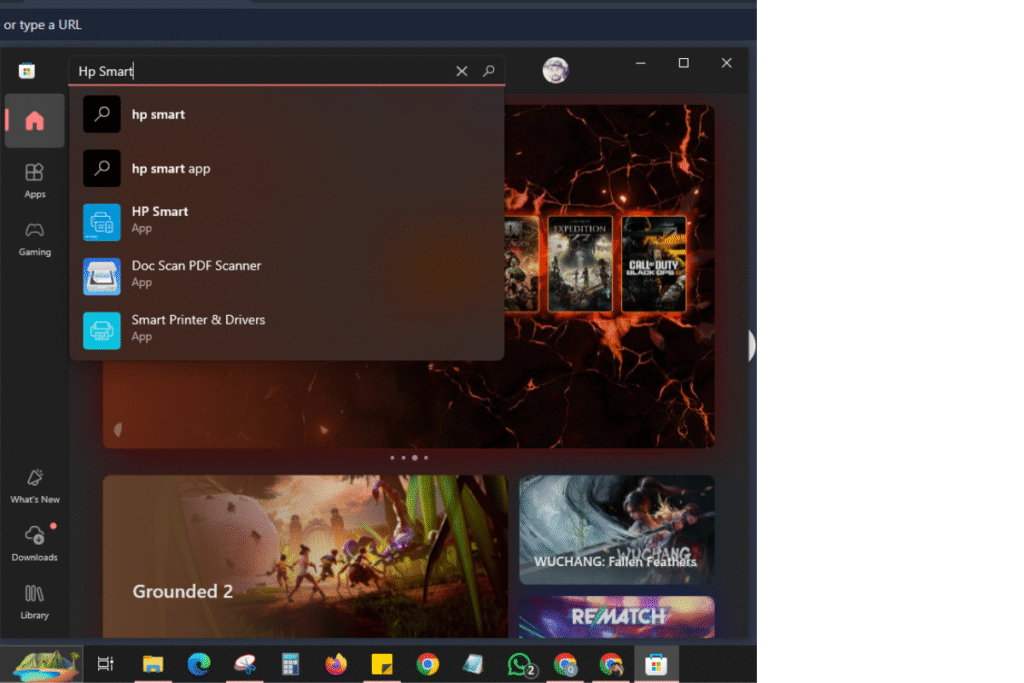
5. Once Microsoft Store is opened, at the very top of Microsoft, on the search bar/address bar, you need to search “HP Smart.”
6. Click on HP “Smart, and then open the app and click on Add a New Printer, or click on the plus sign on your PC to find your current printer to set up.
D. Load the Plain Paper
1. Now you need to load the plain paper. How to do
2. Raise the printer’s input tray.
3. Then slide the paper width guide to the left side.
4. Then load a stack of plain paper into the printer input tray.
5. Slide the paper width guide to the right side until it resets at the edge of the paper.
6. After that, you can lower the output tray and then pull out the tray extender.
E. Installation of Ink Cartridges and Complete the Setup
Now, install the HP ink cartridges that came with your printer in the box.
1. Then, lower the output tray of the printer and open the ink cartridge access door.
2. Then remove the ink cartridges from the packaging.
3. After that, hold the cartridge by its sides, and then remove the protective orange tape from there.
4. Just slide the cartridge into its color-coded slot, and then you should push up until it snaps into place.
5. Then you can close the ink cartridge access door.
F. Put your printer in "Wifi Setup Mode (How?).
1. Make sure the printer is turned on, or you can turn the printer on first.
2. Then we need to put the printer into Wi-Fi setup mode to set it up.
3. For Wi-Fi setup, we need to go to the control panel of the printer.
4. Then press and hold down the “WiFi/Wireless” button and the “Cancel” button together for up to 10 seconds until the power button starts to flash.
5. Then take off the finger from the buttons. After some time, your printer’s power button would stay on and flash. Then
6. The WiFi button would start flashing; that means your has entered the setup mode. (90% work done).
Let’s see the 10% remaining work and what we need to do to complete our setup.
G. Go to your device (like a Computer, laptop, phone, tablet, etc.).
1. First, you need to install the “HP Smart (How?).
(a) In Windows, you need to go to Microsoft Store App/System
(b) In Mac, you need to go to the App Store
(c) In an Android Phone, you need to go to “Play Store.”
(d) On an iPhone, you need to go to “App Store.”
2. Once you are in, then you need to click on Add a new device or click on the (+) sign to find the device.
3. Once your device finds your printer (HP Deskjet 2700 series), follow the on-screen instructions to set up the printer.
4. Then it will ask you for the network name or password (Wi-Fi password).
5. You can put your Wi-Fi password in the Continue.
6. Then it will ask you to press the “Information Button” (i) button for up to 5 sec and then release the button.
7. Then follow the on-screen instructions to complete your setup.
8. Click on test print, and then all is done.
Frequently Asked Questions—FAQs
The HP Deskjet 2800 Printer is good for office and work. This is a multifunction printer that can be installed on any device wirelessly or with USB.
Yes! All-in-One Printer. You Can Print, Copy And Scan.